Showing posts with label kid home actitivies. Show all posts

spring break staycation

Bee is home for spring break.  I was looking forward to take her on mini outings but Peanut is sick so home we stayed.  Luckily I was prepared with a few activities to keep her and Love busy this week.

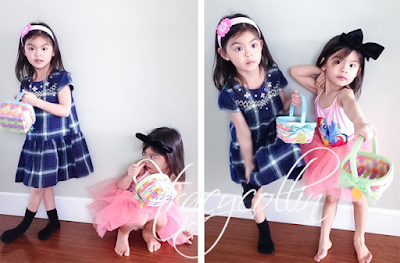
We painted bird houses, painted egg carton flowers, built a tree house for owls out of foams, did 2 egg hunts, play dress up, baked banana breads, went to the playground twice, drank slurpee, danced, went swimming, picked names for our stuffed dogs ( Charlie and Tucker) and caterpillar (Apple), played in indoor playground, painted our nails (7 free Pacifica), and did a lot of Lego and role playing !  

Not sure what's in plan for next week but there're 2 parties and a play date scheduled!  For now I survive the first week keeping 2 bodies busy while caring for a sick baby.


egg carton flower craft


Bee has a slight cold again (remnant from last week) so she's home this week.  Early morning and she's already asking me to do craft with her.  I don't feel so well myself to I told her later.  While resting I try to think up something for us to do as I am low on craft materials.  I think I'm just going to get her to do water coloring. 

Then while separating our recycling bin I came upon an empty egg carton and it reminded me of all the egg carton projects I saw.  I took it and dug out all the paint I had left.  Mostly pink colours but they'll do !

I really like Craft Smart acrylic paint from Michaels.  They sell for something like $1.50 each colour (59ml) and they come in an array of colours.  The paint is non-toxic, permanent, water based and the best part is that it cleans up with a little soap and water.  Knowing my girls, they often paint themselves and the table :)

I used an exacto knife to cut up each egg cup then used a scissor to trim the top of each cup.  We're making flowers so I cut a variety of shapes.  Then off we go painting them !  Easy right ?  

Our finished flowers were glued onto a piece of card stock paper.  Bee asked me to cut her some green leaves from construction paper.  The girls had a lot of fun and so was I !  We will do this again for sure.


Painting is messy business !  Good thing it's water friendly.  Our hands, hairs, clothes, paint brushes and table all got a water bath after and all came out clean !!!

baking frenzy with kids


Bee is home sick so for the 2 days she's home we baked each day !  She asked to do craft but I was busy with a cranky baby that likes to spit up, so we opted for baking.  It's not too time consuming and I don't have to participate full on.  After whipping up the ingredients, the kids get to do the cutting or pouring, then we let it cook in oven (no need to monitor).  Once done the kids get to decorate and eat their creations.  This keeps them busy, while I can still feed baby or take a shower to clean myself from the spit up !  

I also get to decorate a few cookies and cupcakes and eat them !  So yummy !  Recipes below.


CUTOUT SUGAR COOKIES RECIPE  
Prep Time: 
Cook Time: 

Ingredients:

  • 3 cups all-purpose flour
  • 1/2 teaspoon baking powder
  • 1/2 teaspoon salt
  • 1 cup (2 sticks) unsalted butter
  • 1 1/3 cups sugar
  • 2 large eggs
  • 2 teaspoons vanilla extract
  • Store-bought or homemade frosting
  • Assorted sprinkles
  • Equipment: Assorted cookie cutters

Directions:

  1. In a medium bowl, sift together the flour, baking powder and salt.

  2. In the bowl of a stand mixer fitted with the paddle attachment, beat the butter until smooth, about 2 minutes. Add the sugar and continue beating until the mixture is light and fluffy, about 3 minutes. Add the eggs one at a time, beating between each addition, then add the vanilla.

  3. Turn the mixer off. Add the flour and then beat just until combined.
  4. Remove the dough, shape it into a disk about 6 inches wide and wrap it securely in plastic wrap. Refrigerate the dough for a minimum of 1 hour. (See Kelly's Notes.)
  5. When ready to bake, preheat the oven to 350ºF and line two baking sheets with parchment paper.
  6. Remove the dough from the fridge and cut it in half. Roll half the dough between two pieces of wax paper until it's about 1/4-inch-thick. Using cookie cutters, cut out your desired shapes and place them roughly 2 inches apart on the cookie sheets. Repeat the rolling and cutting process with the remaining dough. (Leftover scraps can be re-rolled.)
  7. Refrigerate the cut-out cookies for 15 minutes. (This helps them keep their shape when baking.)
  8. Bake the cookies for 9 to 11 minutes until pale golden, and then transfer them to a rack to cool completely. Frost and decorate as desired.
  9. Kelly's Notes:
  10. The dough can be refrigerated overnight, however when you remove it from the fridge, you will likely need to let it rest at room temperature for some time before it's soft enough to roll.
  11. When in doubt, remove the cookies from the oven just prior to them turning pale golden. The cookies will crisp slightly as they cool, so removing them while slightly underbaked guarantees your cookies will remain soft. For crispier sugar cookies, bake them the full time.

EASY CHOCOLATE CUPCAKE RECIPE

INGREDIENTS

1 1⁄2cups flour
1cup sugar
1teaspoon baking soda
1teaspoon salt
1⁄2cup cocoa powder
1cup water
1⁄2cup vegetable oil
1teaspoon vinegar

DIRECTIONS

Mix all of the dry ingredients well with a mixer or wooden spoon first then add in all your liquid ingredients. It should be brown and smooth, free of lumps.

Bake at 350 F for 15-17 minutes if you are baking cupcakes for a cake I'd say 17-25 minutes.

backyard tea party


The weather has been exceptionally warm.  I don't remember April to be this mild ever.  I should be concerning about global warming finally catching up to us here on the coast, but given the soggy gray winter we just walked out off, I welcomed the sun and warmth with open arms.  We're been out a lot so today after church we decided to do grocery shopping then some garden work !  We will be planting our 2nd fig tree in the yard, a lilac tree in the front near the gate of our drive way, the grape vine and bamboo trees will stay on the wait list as we haven't figure out where to put them yet.

The girls asked for a tea party outside.  Since it's beautiful out, I thought why not !  It doesn't take much effort to have one anyway !  I simply prepared a hot pot of tea (dip the green tea bag in for one second, just for show, for the girls to see they're having "real" tea !), filled the creamer with milk, and lay out some fruits and some cookies.  Our girls like this a lot, drinking from real cup (a break from their plastic ones) and eating snacks ! Come to think of it, who doesn't ?  I like it !  and so too my husband !  Except he has coffee in his cup.

Once downstairs in the yard, I filled 1/5 of the girls' tea cup with tea, leaving plenty of room for milk.  They had about 3 cups of "tea", ate some raspberries then ran off to see their dad planting the fig tree !  They came back for more raspberries, took a sip of tea and wanted to play on the grass !  That's a signal to me that tea party is over.  Tea time is never that long with the girls, 15-20 min. and off they go.  If I leave it out, they will run back for the snacks but I don't like to mix playing and eating together !  Their hands touch everything in our yard, from grass to dirt to snails to worms to ants, so yeah, I try to limit their daily "yucky stuff" intake :-)

It was nice just to be out, planting, checking on our garden and seeing little green spouts poking through the dark soil.  We have lots to look forward to this summer !  I hope our little garden will thrive.  I just can't wait to eat them figs !!!


HOMEMADE | How to make safe finger paint with cornstarch

Jeremiah 17: 7, 8 “But blessed is the man who trusts in the Lord, whose confidence is in him.  He will be like a tree planted by the water and sends out its roots by the stream.  It does not fear when heat comes; its leaves are always green.  It has no worries in a year of drought and never fails to bear fruit.”


The girls wanted to do some finger painting and I just finally picked up some food coloring the day before so it was perfect timing.  My eager helpers and I set out to make some home made paint !  10 min. of taking turns stirring the mixture, rearranging (they like to rearrange things) the paper plates lay out, and debating over what color we should have, we settled on 5 colors:  blue, green, red, purple, and yellow.  We divided the mixture onto each plate, put a drop or two of food coloring on top and the girls take turn mixing the color in.  It was nice seeing all the swirls of colors.

The kids had a great time playing with the paint !  squishing paint between fingers, drawing on paper, painting on paper, and then they took their kitchen toys out and pretend they're cooking with them.  There were drops of gooey color all over the floor, table, and their aprons.  It's very very messy but oh so much fun !  I was mushing them on my fingers too.  It's like playing with sticky goo :)  We make a lot of messies around here :D  Anything fun will come with some kind of mess !  The kids love it and I love it.  The best part about this is that, cleaning is just as easy as making it !  you can wipe the paint off all surfaces with a damp cloth and all is nice and all is good again.

For this safe-to-eat paint, you will need corn starch, cold water, boiling water, and food coloring.  1/2 cup of corn starch, about 1/4 cup of cold water, and depending on how you like the paint texture to be, any where between 1 1/2 cup of boiling water to 2 cups.  Although the paint is safe to ingest, I still discourage the kids to put in their mouth.  I rather them think that paint is not food :D


Instructions:

Non cook method:
  1. put 1/2 cup of cornstarch into a measuring cup
  2. pour in 1/4 cup of cold water on top of the starch - DON'T MIX it just yet.  Just gently swirl the hand whisk around, for the water to mix in with the TOP LAYER of the starch, the bottom should be dry still.
  3. slowly pour in 1/2 cup of boiling water in (it should immediately thicken up the liquid), with the hand whisk, slowly mix all the starch into the water.  Pour in another 1/2 cup of boiling water and mix around, make sure you get all the dry starch at the bottom.  It's very thick and uneven texture right now but it's just temporary.  Pour in another 1/2 cup of boiling water in and mix well.  Repeat this with the rest of the boiling water.  It should slowly loosen up and turn into a translucent smooth jelly like consistency.
  4. divide mixture into individual containers (or paper plates) and add food coloring to each.  Use a paint brush to mix the color around.
Cook method:

Another way to do this is to mix 1/2 cup of corn starch with 1 1/2 cup of cold water in pot.  Put the pot on the stove, turn heat on to medium and continuously stir the mixture around until it reached your desired consistency.  If too thick, add more water and stir well.

Enjoy !


Zipzicle: ice pop pouch freezies

A few days ago I was sent a package of zipzicle to try out !  My first tester and it was a success.  I filled some with strawberry banana smoothie and some with lychee juice (it was such a tasty drink so I wanted to make freezies out of them for me :) because it's so so so very hot out).

Here are my findings:

PROS:
- no stick, no drips, no crying baby over dropped ice cream !  it's mess free for kids
- excellent way to get your kids to eat fruits (& veggies)
- great for teething baby (my youngest screams (happy squeal) at the sight of it)
- easy for kids to push the ice goodness up
- pouch is reusable for at least 1 more freeze (or 2 :)
- inexpensive
- great on the go (I used it to keep the kids busy on long car ride :)
- better than store bought freezies as those are loaded with sugar, with zipzicle, you control what you put in there ! 

CONS:
- you need a funnel to get the liquid into the pouch
- you need to freeze the pouch (standing) in a container

If you're going to order these, order at least 36 pouches (or more) because you would want to try different recipes, mixes, etc.  Get the kids involve in the prepping and filling of pouches !  A fun family activity and then you get to enjoy the ice goodness together after. 


how to make homemade playdoh without cream of tartar


Bee wanted playdoh so I quickly whipped up 2 colours of playdoh for her.  I found making homemade playdoh not only cheap but also makes me feel safe that there's no preservative or other crap stuff added to the mix !

To made 1 big ball (about 4" in diameter), enough for 2 kids, I measured 1 cup of flour (Robinhood brand), 1/3 cup of salt (+ a bit more), 1/2 tablespoon of canola oil, and 1/2 cup of lukewarm water.  

For color playdoh, add a few drops of food coloring into the water.  

Mix the flour with the salt, add in the oil, then slowly add in 1/4 of the water, mix through (flour mixture will be dry and crumbly) then 1/2 of what's left of the water, mix through then add the rest.  

Knead and press in all directions, put pressure as you work through the dough.  If you have older kids, let them knead the dough for you ! 

I found the playdoh to be really chewy (?) and soft to touch (how the kids like them).  If you like it a bit more dry, sprinkle on some flour and work them through.

Store playdoh in a sealed container when done playing (or wrap tight in saran wrap).  Should last for a few days.  Have fun !  


fun with kids : home activities

I don't know why it took me this long to realize that as long as the kids are occupied, they won't be so crazy hyper active !!!  Both is my kids aren't into toys :( 10 min. and they are ready to move on to something else.  "What we do next?" Bee would say when she's bored.  Watching cartoon isn't her thing either.  Which in a way is good !  And only not so good when I need her to leave me alone to put baby to sleep or to make lunch or dinner.

It rained this morning so I decided to make some home made paint.  1/2 cup of flour, water and salt.  Add a few drops of different food colouring and they are ready for a master piece.


The rain stopped just about when Bee and Lovebug is done with their finger painting.  I took them out to play in our "renovation in progress" yard.  After what feels like an hour pushing both swings, I came up with an activity to keep them both busy and give me some rest :)

Imaginary fish pond with clovers as fishes and butterfly catchers as fishing nets.  It sure keeps them entertained for a long time !  I have to pat me on the back for that one :) 


After a warm bubble bath and hot lunch, the kiddos still have lots of energy.  They drained all mine though.  A box of recent delivery was sitting on the floor and Bee made it into a tube.  I suggested to her we play red, yellow ad green.  In her words "red means stop, green means go and yellow is be careful" !  Hubby taught her that. 

With the box on her, Bee was a mean car ready to follow which ever color I yelled out.  She ignored most yellow and red and treat them as green so she can speed down the hallway with Lovebug trailing behind.


Then both kiddos took turn sitting inside the box.  Bee said they are pretending to be a toy in a box and that I need to open the box and pull them out.  They are dolls for me to play with !  I tried pressing a few buttons on Bee (like those toys with the "press here" switch) but all she did was giggles!  

Lovebug went to hug me and signaled that she's ready for nap (rubbing her eyes).  I suggested to Bee that she should watch Dora and have some snacks.  She complied but was bummed out that baby can't play with her.

Hubby came home from work a bit early so we quickly ate dinner then went swimming.  All and all it was an activities-ful day.  The kids were out around 9ish.  Hubby and I decided to watch a movie together and gossip about our kids in between scenes :)

Search