afternoon delight

Rainy Sunday morning.  The kiddos are sick at home with hubby while I trek the downfall to meet up with some friends.  It's my bestie's birthday today.   I decided to take her out for afternoon tea and invited some other excellent women (one who is 5 days passed her pregnancy due date !) to accompany us.  I never done high tea or afternoon tea.  From what I heard they're snooty uppity doo kind of place and I'm not into that.  But it's not my day so I go with what I think she might like !  (quality times with friends and so I thought afternoon tea would be great).  I tried to book Secret Garden but it was fully booked (who knew I have to do that weeks in advance ? for tea ? really ?) so I opted for Petit Cuillere, another high tea place that has good reviews and it's apparently friendly !
 
My first thought upon entering the establishment was, cozy !  I feel warm and cozy !  it's so quaint.  The wall color, the china cup planters, the chairs, the table linen !  I love the high ceilings and long curtains.  The walls and walls of fine china keeps my eyes busy while waiting for others to arrive. 
 
Once everyone arrived, settled in our huge comfy chair and ordered our tea, we started to talk about everything under the sun !  A few times we jokingly reminded each other how the topic of our conversation isn't suitable for high tea :-)  of course that doesn't stop anyone of us ! 

We all opted for high tea instead of afternoon tea as few of us crave Pho (it's comfort food for us, esp. on cold rainy day like this.  A hot bowl of steamy Vietnamese noodle soup !  and it's just a few doors down from here!).  The 2 tiers tray came out with cute sweet and savoury tidbits.  They were all pretty good.  I like the warm orange scone the most.  3 hours rolled on by and we're all full, partly from the food, but I think mostly from the tea because we all got about 2 refills.  It was all in all a great experience !  The service was excellent. 
 
Would I do it again ?  absolutely.  I so wanted to wear long dress and wide brim hats.  I might do that with my mom and Bee.  We can all dressed up and be transported back in time.  A time of no digital devices, no rush errands to do, no place to be at...and we just sit around and drink tea and talk and watch clouds floating by.....


a very hungry caterpillar birthday party

Our girls are turning 4 and 1.  They're such fun kids !  Love is already walking at around 9 months and Bee is getting ready for preschool.  They are happy silly kids and we're celebrating another milestone with them.
Yesterday we threw the girls a "A very hungry caterpillar" birthday party theme !  Bee loves hungry caterpillar so she asked me months and months before to have a caterpillar party !!! 

So, it started with the invite card:


Being the frugal and wanna-be-crafty mommy, I sketched out what design I want in mind and went Dollar Store hunting for décor.  Tissue pom poms or puff balls are super cheap and make big fun statement :) so I decided to make a caterpillar from tissue balls :)  which then gave me the idea for the room décor >  colorful puff balls !  then the caterpillar Monday-Friday fruits table, sweet treat table, giveaways and buntings to tie the theme all in !

Here are pictures of the party and if you scroll down below I posted the FILES of some designs I created, HOW TOs and WHERE TO BUY sections if you want similar décor.  You can download the files, printed them on card stocks, cut out the rounds and use them for the fruits cards and thank you tags.  Enjoy !


Fun colorful pom pom tissue balls !
  

Bee's favorite candies for adults and kids !  there's little takeaway box for each to fill up and take to go !


My eldest enjoyed the party very much !  My youngest ?  she didn't say anything :-)  her eyes lit up at the sight of all the colorful puff balls so I supposed she likes that !  Overall, hubby and I had fun decorating !  I enjoy it most (don't all moms ?) and the best part, it didn't cost too much and I can reuse all the puff balls for our summer garden tea party :D 

WHERE TO BUY:

For décor I went to Michaels and brought the following items there (ranges from $1.50-$3):

-  wooden initial
-  paper treat bags
-  wind-up toys (for babies)
-  candy take out boxes
-  pink small wooden frames (these are super cute)
-  color stock papers (for HAPPY BIRTHDAY flag)

Went to Dollarama and picked up:
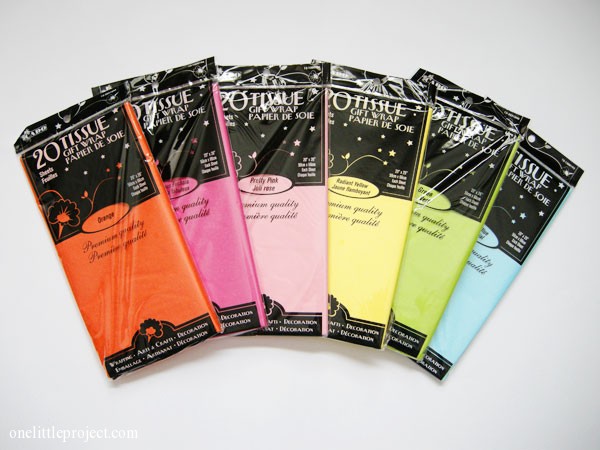
-  colorful tissue packages ($1/pack) for paper pom poms (for caterpillar you'll need 1 pack of red, 2 of dark green and 2 of light green)
-  green utensils
-  wooden clips (for treat bags)
-  colorful balloons


DOWNLOADABLE FILES:

Here are files for the fruit tags (print on card stock paper, tape a toothpick behind it and stick it onto a fruit :-)  thank you giveaway bag tags (caterpillar & butterfly), flags, blank tags & water bottle label !


For the flag, you can download each individual file (flag 1-5, smaller file size) or the whole file hungry caterpillar hanging flag.pdf !  Enjoy !
  

HOW TOs:


GOODY BAG: 

I picked up most of these at Target:

- non-toxic bubble bottles
- 3 different colors playdoh container
- 2 of snack-size cookies and crackers bags (Annie's organic from Costco)
- a pack of slime goo
- 1 sticker book
- 1 take-away candy box

You can put anything in the bag really, crayons, doodle booklet, whistle, balls, etc.  I found that most, if not all, kids like stickers and bubbles so those 2 are my go-to items.

Easy cupcake frosting (butter, milk, flour, vanilla, sugar)

REPOST from ourbestbites.com
 
 
Easy Cupcake Frosting and Filling
 
3 tablespoon Flour
1/2 cup whole milk (I use half whole milk & half coconut milk)
1/2 cup real butter (I use unsalted, but salted was recommended for better taste)
1/2 cup granulated sugar (I use organic cane sugar)
1 teaspoon vanilla extract, or other flavor if you wish.
 
Instructions:
 
Whisk together the flour and the milk. Heat in a small sauce pan on medium heat.Whisk continuously until it starts to thicken. Let it cook, while stirring, until you can start to see the bottom of the pan. Smash any flour lumps with a rubber spatula to keep mixture smooth.
Keep cooking mixture until it resembles thick pudding, almost a paste-like consistency.

Put this mixture in the fridge and let it cool
completely, it’s fine if it stays in there long enough to get chilly, you just don’t want it warm at all. As it’s cooling, feel free to stir it occasionally to speed up the process and keep it from forming a crust on top.  When it is chilled, you can move on to the following step.
 
NOTE:  I don't have a stand mixer so I used the hand held one !  it's a bit tiring and time consuming but the result is excellent !  sooooo fluffy, light and amazingly good !!!
 
 
It an electric stand mixer, beat the butter and the sugar for a minute or two until well combined and fluffy. You’ll want to use the whisk attachment on a stand mixer, not the flat paddle. Then while beating, add in the thickened milk mixture and the vanilla. Beat to combine and then scrape down the sides. Don’t be scared. It’s going to look like a goopy mess and kind of lumpy and separated like this:
 
But you just wait. It’s gonna blow your mind in a few minutes. Beat on med-high until it comes together and becomes light and fluffy.  It can take anywhere from 5-10 minutes.
 
It will transform from that sloppy mess into something gorgeous, fluffy, and incredibly light and silky.  If the time has passed and it still looks like a hot mess, just keep on beating and it should eventually come together.  Feel the mixture between two fingers to see if the sugar granules have dissolved; if not, just beat a little longer.
 
Use it to fill or frost cupcakes, cakes or other pastries. You can’t go wrong putting this on just about anything :)
 
Frosts 12 cupcakes, lightly.  I almost always double it.

How to make tissue paper pom poms or puff balls

Repost from onelittleproject.com.  Go visit her site for some easy diy projects and crafty ideas.

I made different color poofs and hang them from my ceiling fan !

Tissue paper pom poms, also known as tissue paper balls, or tissue paper poofs.

You can get tissue paper at the dollar store, 20 pieces for $1.  So that’s two large tissue paper pom poms per pack making each one only $0.50.  For the medium size, 1 pack will yield 4 pom poms.

how to make tissue paper balls | onelittleproject.com

How to Make Tissue Paper Pom Poms:

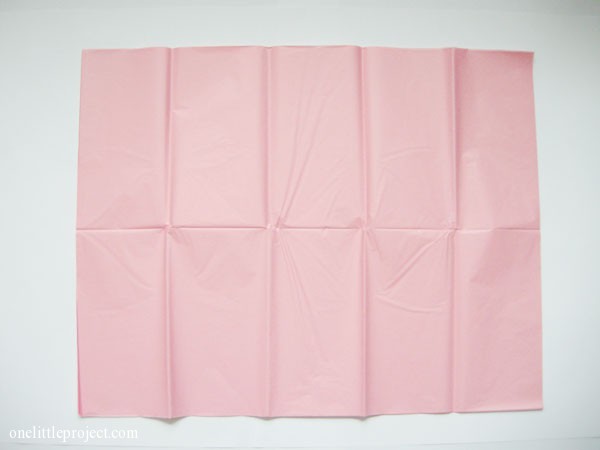
Count out a pile of 10 sheets of tissue paper and lay them flat:
sheet of pink tissue paper
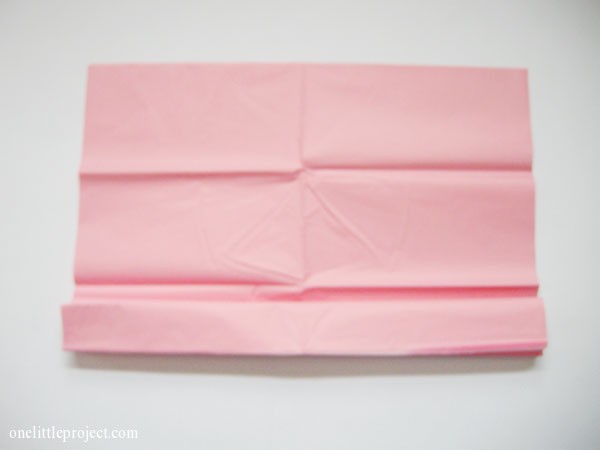
Fold the end in about 1″ to 1.5″ and fold it accordion style (fold, flip over, fold, flip over, repeat): how to make tissue paper poofs | onelittleproject.com

Continue to fold it accordion style:
how to make tissue paper balls | onelittleproject.com  

Until you have folded the whole thing: how to make tissue paper poofs | onelittleproject.com

It doesn’t need to be perfect.  The tissue paper is pretty forgiving: making tissue paper pom poms

Fold it in half to find the center:  
making tissue paper poofs

Wrap a wire around the middle (I used dollar store jewellery wire): making tissue paper pom poms

And secure it to hold everything in place (Note: This would be a good time to attach thread or fishing line if you plan to hang it): making tissue paper poofs

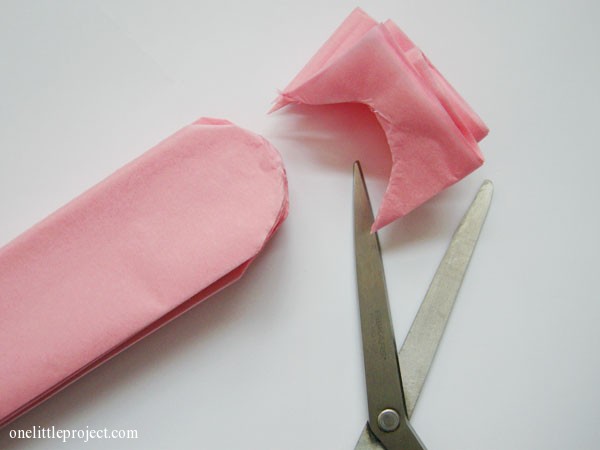
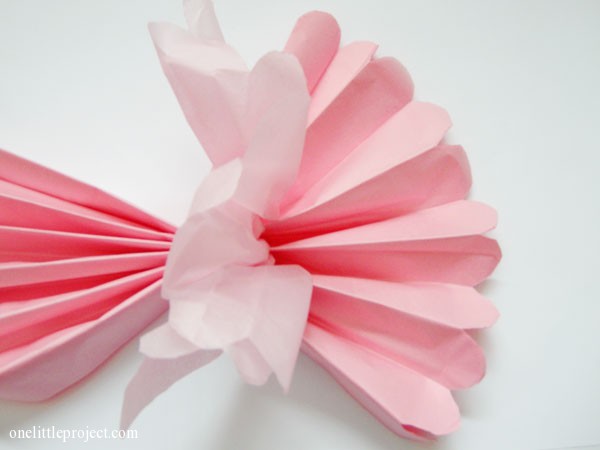
Round the edges of both ends.  The shallower the cut, the shallower the “petals” of the tissue paper pom pom will be: making tissue paper balls

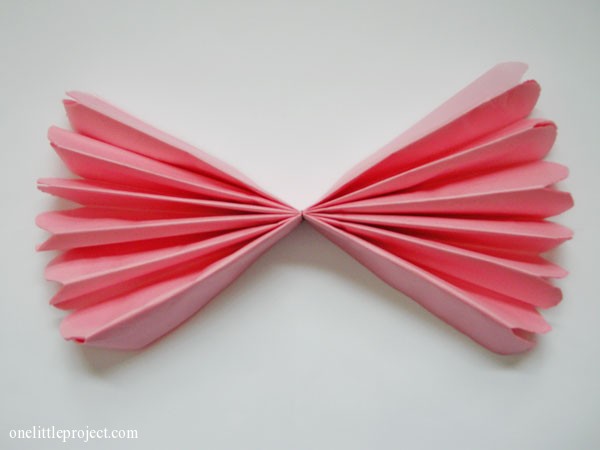
So now you should have something that looks like this: how to make tissue paper pom poms | onelittleproject.com

Take one piece of tissue paper:
how to make tissue paper pom poms | onelittleproject.com

And pull it away from the rest of them: how to make tissue paper balls | onelittleproject.com

Continue pulling apart the layers of tissue paper: how to make tissue paper poofs | onelittleproject.com

The layers will start to look like this:
diy tissue paper pom poms

Once you finish one half, pull apart all the layers of the second half: diy tissue paper pom poms

Fluff up all the layers until you get it into a good ball shape: diy tissue paper pom poms | onelittleproject.com

Then hang it from the ceiling with some fishing line and you are good to go!

Search